When we last left our intrepid explorer..............
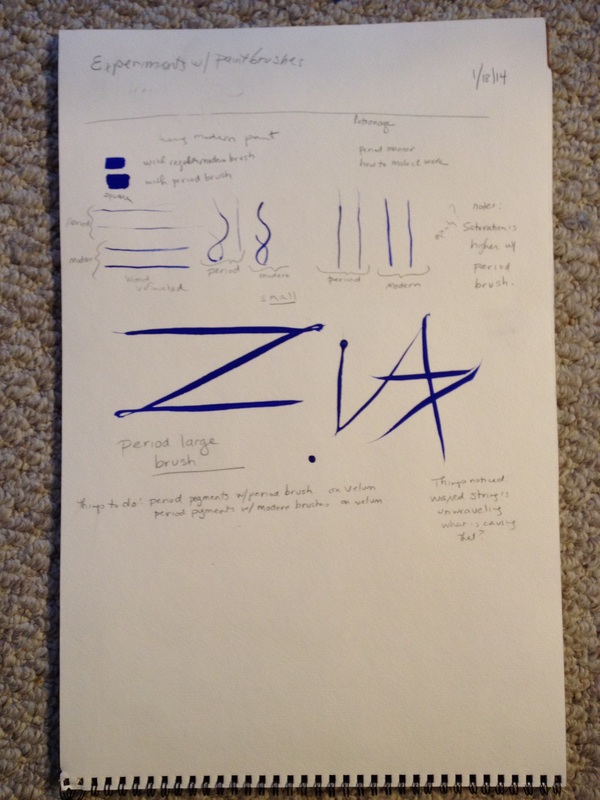
I had made some paintbrushes and was continuing to figure out what was needed, what needed tweaking.
It was one year ago Pennsic (August, 2013) that I visited with someone on artisans row who made her own paintbrushes. The brushes she made were big, she said all sorts of unkind things about Cennini (which may or may have not been true) and I was able to try out making a brush.
I started looking for examples and pictures so that I could see what the paintbrush would look like in period and help to make more brushes.
 | Boccaccio’s De Mulieribus Claris, France, early 15th century 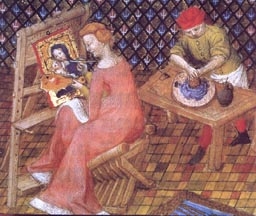 |  The Painter and Art Lover by Pieter Bruegel the Elder Completion Date: 1565 |
 |  | 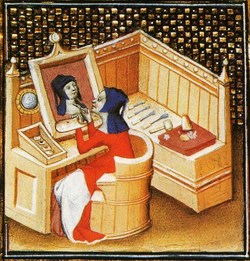 Unknown Artist from Giovanni Boccaccio France c 1440 |
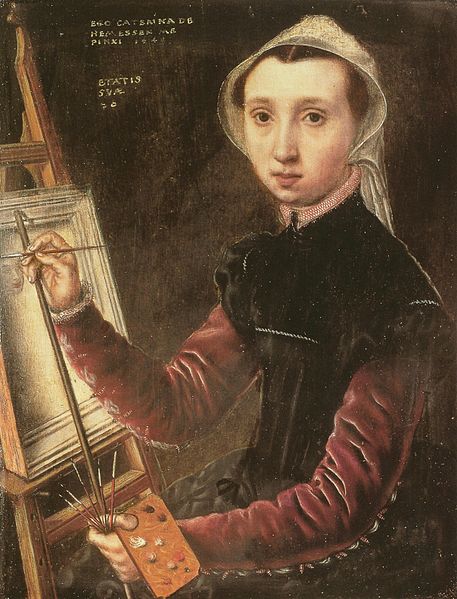
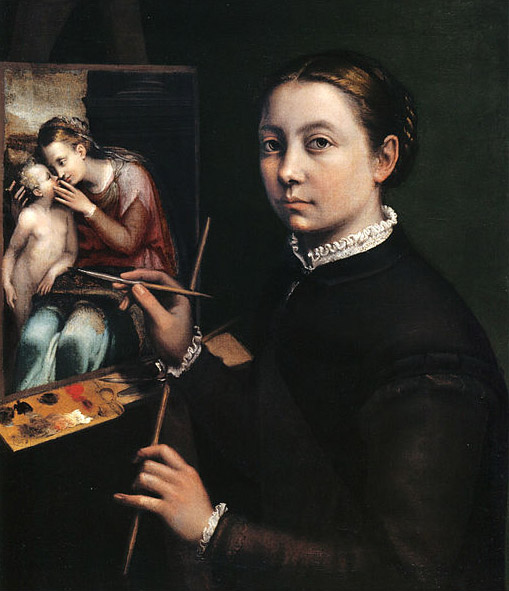
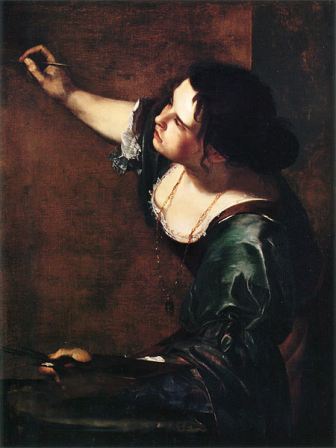
Sofonisba Anguissola Artemesia Gentileschi
Italian painter, 1532-1625 Italian painter, 1593-1652
Italian painter, 1532-1625 Italian painter, 1593-1652

So the brushes needed to be more slender, smaller.
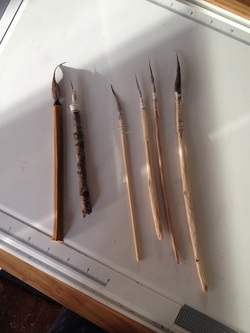
And as you can see from my second tries Here, you can see the first two to the left were the Version 1, the rest were Version 2. Thinner, but there was still some design flaws.
So I acquired some materials. I actually bought a pelt of weasel (or ermine, or stoat). This little guys tail would be sacrificed for a paint brush.
And I took some hair from my beloved.
At Pennsic, I sent my minions out. Mistress Caitrin's twin boys are 14 and carry my favor. I dote on them, giving them shirts and other things, and they will do just about anything for me. Including hunt around Pennsic for appropriate sticks of the right length and width.
After several tries they were able to come up with what I needed. It did feel like a medieval moment as it felt like this is what a craftsman of the time would do. He would send his very young apprentices out doing these things as part of their training. Alas, neither boy was much interested in pursuing what I was doing with the sticks beyond the response of "Cool" when I told them what I would be doing.
I also purchased some fish glue from Guild Mirandola and some feathers.
The materials all came back with me from Pennsic, waiting for the right synergy.
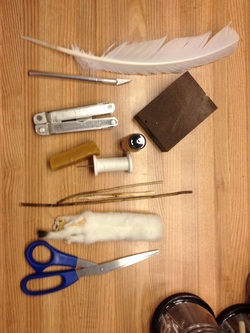
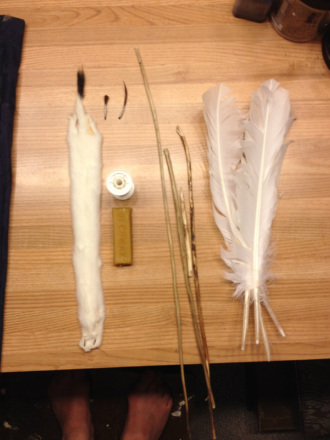 The materials collected, ermine, wax, thread, sticks, feathers. | 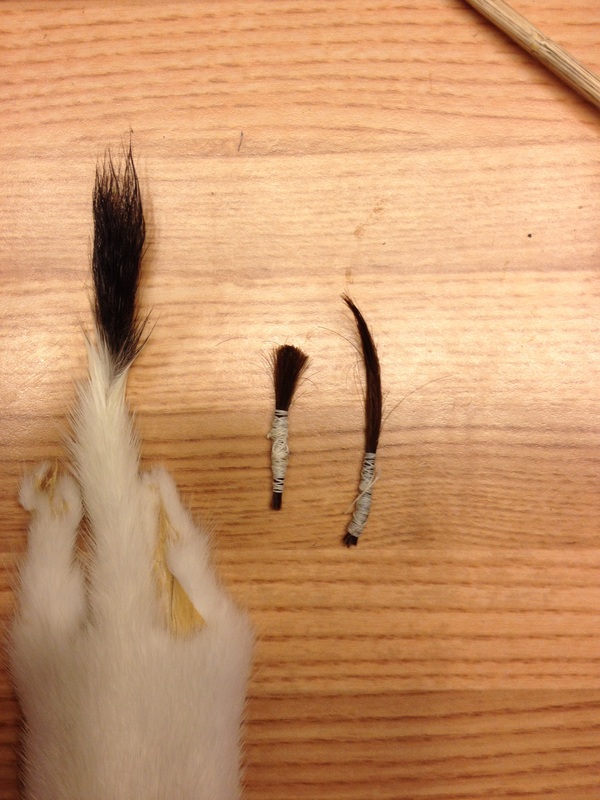 The tail of the ermine, and the human hair threaded and waxed. |
About a week ago, I wrapped the human hair with the waxed thread, perfecting my wrapping technique. Today was cutting the ermine tail and wrapping it with the waxed thread.
I also figured out that I should probably put together a materials list if someone wanted to try this or check their results against mine. At the end of this, I will provide the list.
Next step, cutting the tips of the feathers and cleaning them out. I tried a couple of different methods. One was cleaning it out with a large needle, another was washing the inside out and then pushing the remains out with a needle. I could not find any mention of details so there was some experimentation. Both ways still provided satisfactory results.
I pushed the wrapped hair into the ferrule (formerly tip of feather) with some fish glue delicately placed on the wrapped end. I then tipped the wood handle with fish glue and pushed it into the other end of the ferrule. I did this for the other wrapped hair and for the ermine. Then there was waiting while it dried. I could already see that these brushes were starting to look more like the paintings in the time period I was studying.
Notes : applying the fish glue was a pain. It got everywhere. I took one of the wooden sticks that had broken into a smaller piece and used it to apply the glue, but I still ended up with glue dripping quite a bit. Fish glue had a more liquid state then other glues that I have used when first applying, but firmed up rather quickly.
Notes : applying the fish glue was a pain. It got everywhere. I took one of the wooden sticks that had broken into a smaller piece and used it to apply the glue, but I still ended up with glue dripping quite a bit. Fish glue had a more liquid state then other glues that I have used when first applying, but firmed up rather quickly.
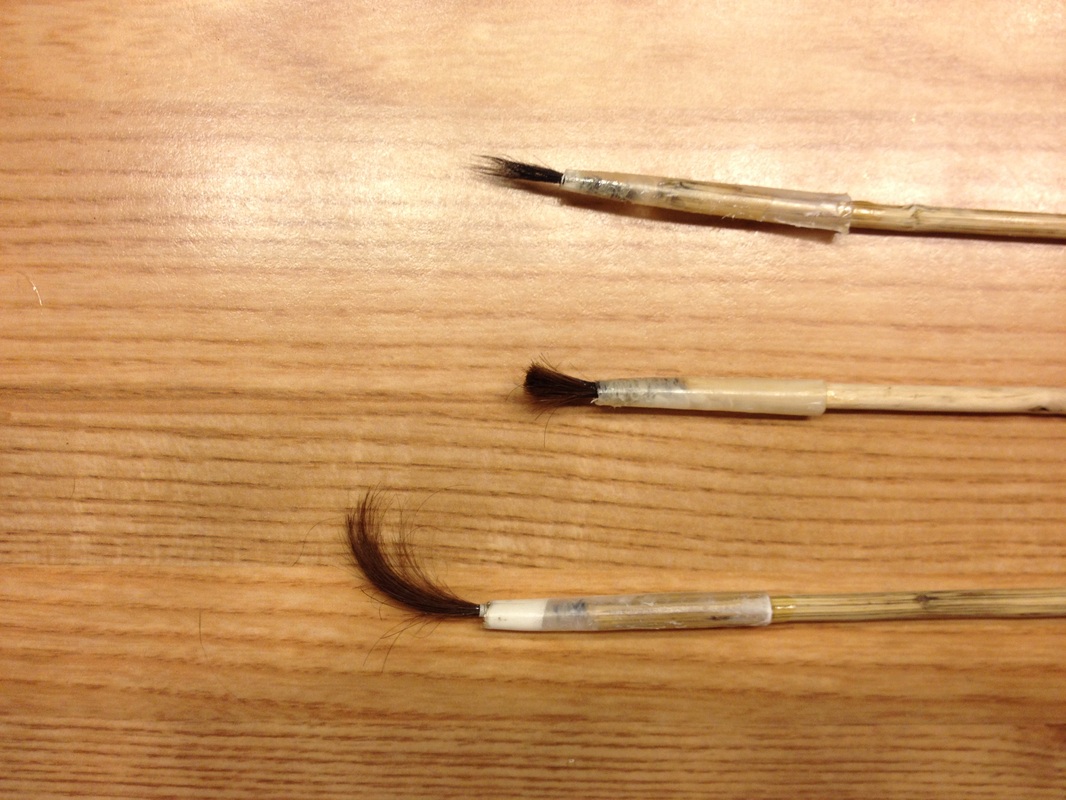 | 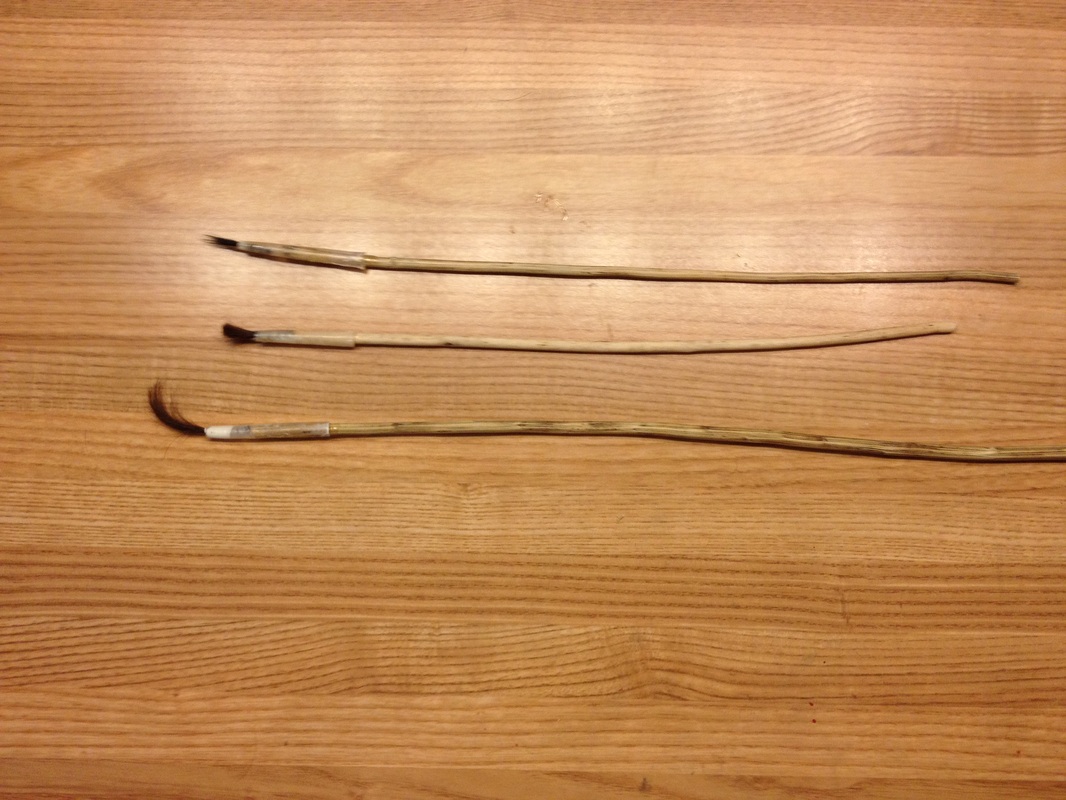 |
Results - I'm happy with the results. Left is the closeup, right is the whole brush. Bottom two are the human hair, and the ermine is the top.
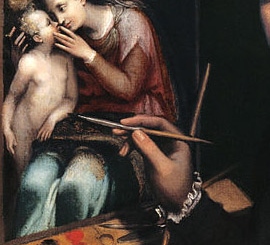
So let's look at the paint brush made and then a zoom in of Sofonisba Anguissola and her paintbrush.
So let's look at the paint brush made and then a zoom in of Sofonisba Anguissola and her paintbrush.
 |  |
So let's compare the paintbrushes from the beginning and see there progression.
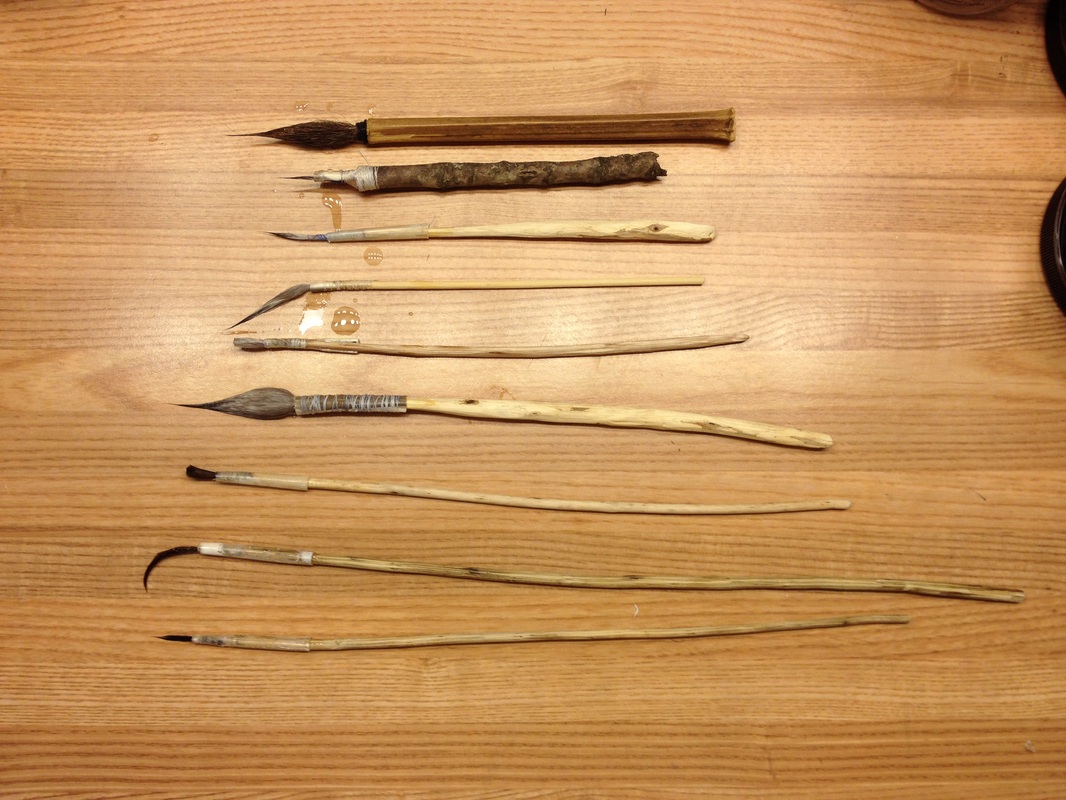 Top to Bottom, 1st two were the Version 1, third, fourth, fifth and sixth were Version 2 and made with fox hair, local deadfall that I gathered and whittled down, and regular glue. Seventh, eighth and ninth were made with human hair and ermine with fish glue with deadfall gathered by young men working in my employ (I paid them). I whittled very little, and sanded the wood pieces. | 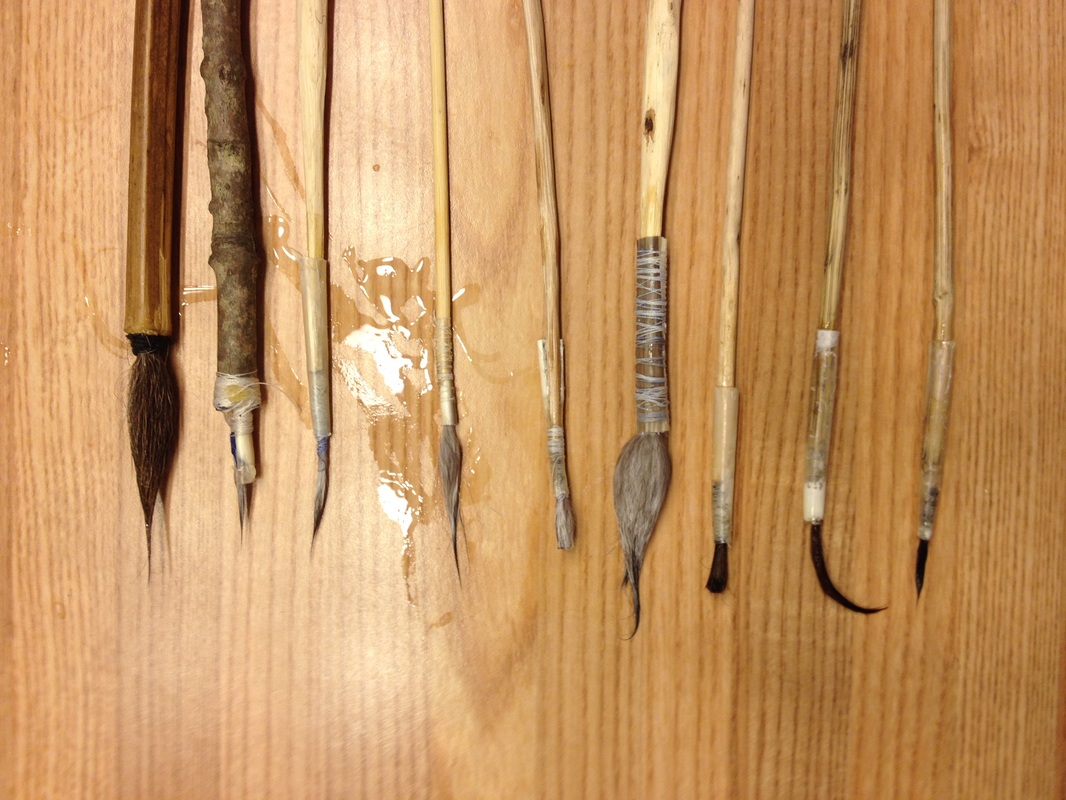 Closeup of the work, left is the oldest pieces, right is the most recent. I can definitely see improvement. I also wet them all down (you can see the water on my art table) to see how they presented with liquid on them. |
The next steps:
1. Put this all together for Voyages of Discovery.
2. Make up some paint and do another test run on how the most recently made paint brushes react to paint. Record data.
3. Actually try to use the last three paint brushes to work on a painting.
Things I learned:
How to whittle
How to tie similar to what you do to tying a fishing lure
How to improve my craftsmanship
| Above and to the right -picture of materials used. And for those playing along at home, here is the list of materials so that you can try it out and check my results. Materials: Hair for brush, ermine, hog's hair, human hair, fox, etc. Deadfall, sticks. Depending on the size, some whittling will be needed Feathers (cut about two inches of end for ferule) Sandpaper or sand block thread wax fish glue swiss army knife, for whittling, cutting, etc. scissors x-acto knife for cutting Large needle (leather or canvas size) | 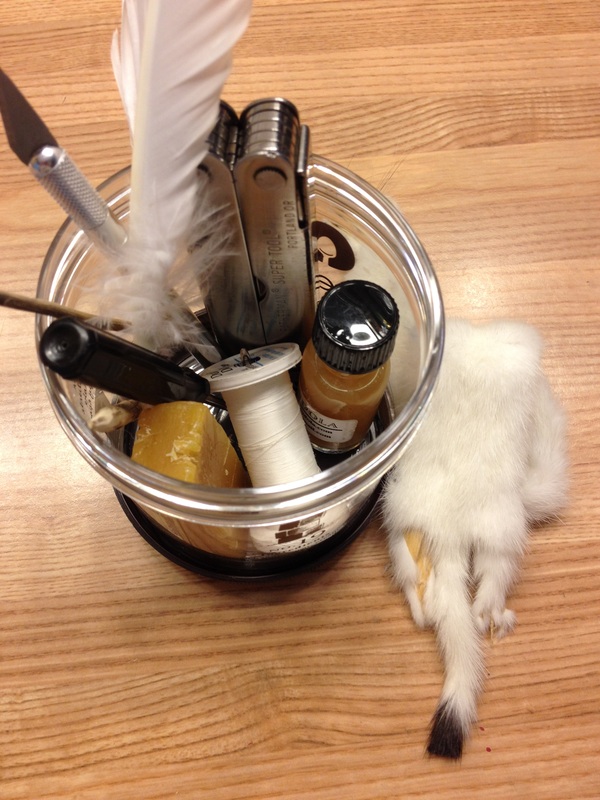 |

 RSS Feed
